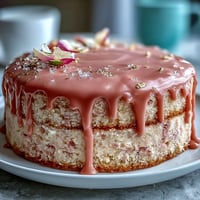
Pin This
 My sister called me three days before Mother's Day in a panic—she'd promised our mum a fancy dessert but had no idea what to make. I found myself describing pavlova over the phone, and somehow I ended up volunteering to bake one at my place first to prove it wasn't as terrifying as it sounded. Standing in my kitchen that afternoon, watching egg whites transform into billowing clouds under the mixer, I realized this dessert wasn't just about impressing someone. It was about creating a moment that felt both effortless and magical, the kind of thing that makes people feel truly celebrated.
I'll never forget serving this at Mother's Day brunch when a guest cut into it and the whole room went quiet for a second before everyone erupted. My mum just smiled and said nothing tasted as good as dessert someone had obviously cared about making. That comment stuck with me more than any compliment about the berries or the cream.
Ingredients
- Egg whites (4 large, room temperature): Room temperature eggs whip up faster and create more volume—take them out about 20 minutes before you start, and make sure your bowl is completely grease-free or they'll refuse to cooperate.
- Superfine sugar (1 cup): Regular granulated sugar works in a pinch, but superfine dissolves faster into the egg whites, giving you that glossy, thick meringue texture.
- Cornstarch (1 tsp): This tiny amount stabilizes the meringue and helps create that coveted chewy center—don't skip it thinking it won't matter.
- White vinegar (1 tsp): The acidity helps stabilize the egg whites and adds a subtle tang that balances the sweetness without being noticeable.
- Pure vanilla extract (1 tsp): Use the good stuff here because you'll actually taste it—imitation extract can taste slightly metallic against the delicate meringue.
- Heavy whipping cream (1 cup, chilled): Cold cream whips faster and holds peaks better, so pop your bowl and beaters in the freezer for five minutes before you start.
- Mixed berries (4 cups total): Pick berries that are just ripe—slightly firm strawberries and blueberries hold up better than soft ones that'll weep juice and turn everything pink.
- Fresh mint (optional): A few leaves scattered on top add a bright, garden-fresh touch that makes the whole dessert feel intentional and elegant.
Tired of Takeout? 🥡
Get 10 meals you can make faster than delivery arrives. Seriously.
One email. No spam. Unsubscribe anytime.
Instructions
- Set yourself up for success:
- Preheat your oven to 250°F and line a baking sheet with parchment paper, then draw a 9-inch circle as your guide. This low temperature is key—it dries out the meringue gently rather than browning it.
- Whip those egg whites:
- Start beating with a pinch of salt until you see soft peaks forming, then begin adding sugar one tablespoon at a time. This gradual addition is crucial because it lets the sugar dissolve properly and prevents the mixture from becoming grainy or weeping.
- Build glossy stiff peaks:
- Keep beating for about 5 to 6 minutes total until the meringue looks shiny and thick, with peaks that stand straight up when you lift the beater. If it looks dull or separated, you've overdone it—back away slowly and use what you have.
- Fold in the magic ingredients:
- Gently fold in the cornstarch, vinegar, and vanilla using a spatula, being careful not to deflate all that airy volume you just created. A few gentle strokes are enough—you're not trying to fully incorporate these, just distribute them.
- Shape your meringue nest:
- Spoon the mixture onto your circle, using the back of a spoon to create slightly raised edges that'll hold the cream and berries. Don't aim for perfection here—rustic and slightly uneven actually looks more impressive on the plate.
- The long, slow bake:
- Bake for 1 hour 15 minutes, then turn off the oven and crack the door open slightly, letting it cool inside for at least 2 hours. This gradual cooling prevents cracks and keeps that marshmallow center tender.
- Whip your cream:
- While the pavlova cools, whip cold cream with powdered sugar and vanilla until soft peaks form—this shouldn't take more than 2 or 3 minutes. Don't overbeat or you'll end up with something closer to butter.
- Final assembly:
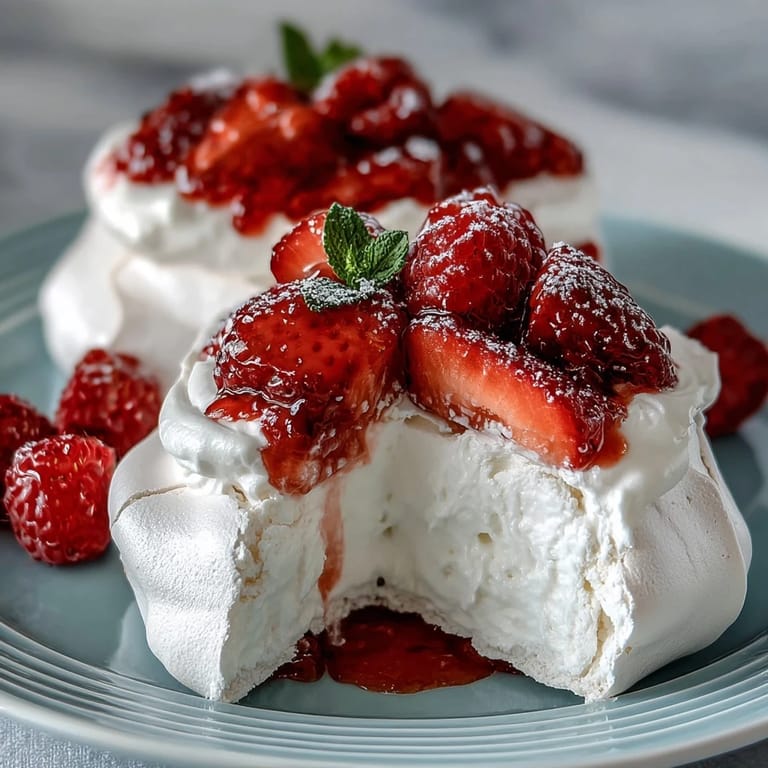
- Transfer the cooled meringue to your serving platter, dollop the whipped cream on top, then arrange berries in whatever pattern feels right. The whole thing comes together in under 5 minutes, making you look like you've been a pastry chef all along.
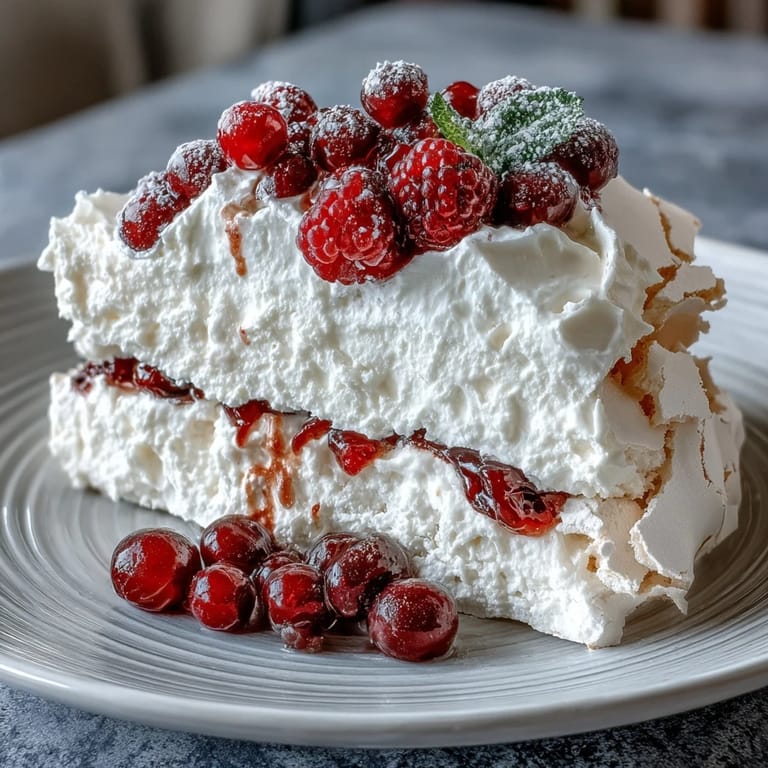 Pin This
 There's something deeply satisfying about the sound of a spoon breaking through that crispy shell for the first time, hearing everyone at the table pause and listen. This dessert is less about technique and more about creating anticipation—the kind of simple moment that makes ordinary days feel special.
Timing and Prep Strategy
The beauty of pavlova is that it actually prefers to be made a day or two in advance—the meringue keeps beautifully in an airtight container and actually gets even crispier overnight. I usually bake it in the afternoon, let it cool completely, then cover it loosely with plastic wrap. The whipped cream and berries should be added no more than 2 hours before serving, or the cream will start to weep and the berries will lose their freshness.
Flavor Variations Worth Trying
Once you've made this classic version, it opens up a world of possibilities that feel less like guessing and more like creating your own traditions. Summer feels like berries, but autumn could bring sliced peaches and blackberries, or even a passion fruit curd swirled through the cream. I once folded sifted cocoa powder into the meringue for a chocolate version, and my partner still asks me to make it that way, which tells you something about how flexible this recipe is.
The Little Details That Change Everything
I learned the hard way that the way you shape the meringue actually matters—if you make it too flat, it'll crack as it cools, but if you give those edges a little lift, they support themselves like a bowl. The cornstarch and vinegar seem like tiny additions, but they're the difference between a meringue that looks sad and deflated versus one that looks proud and capable of holding generous amounts of cream. Even the order of assembly makes a difference; I've found that adding cream first, then berries, gives a better presentation than the reverse.
- Always use a hot, damp cloth to wipe your mixer bowl right before beating egg whites, as even a trace of grease will sabotage everything.
- If you're nervous about the whole thing, remember that even slightly imperfect pavlovas taste absolutely wonderful and look charmingly rustic.
- Make this when you have time to enjoy the process rather than rushing—the extra five minutes of care shows in the final result.
 Pin This
 This dessert has become my go-to for any celebration because it proves that simple, elegant food doesn't require last-minute panic or complicated techniques. What matters is showing up with intention and creating something that makes the people you love feel seen.
Recipe Q&A
- → How do I get a crisp meringue with a soft center?
Bake the meringue at a low temperature for over an hour, then allow it to cool slowly in the oven with the door slightly ajar. This drying process creates a crisp shell while preserving a marshmallow-like center.
- → Can I substitute the berries with other fruits?
Yes, seasonal fruits such as kiwi, peaches, or passionfruit can be used for a different flavor profile and freshness.
- → What is the purpose of cornstarch and vinegar in the meringue?
Cornstarch helps stabilize the meringue and keeps the center soft, while vinegar enhances the structure and prevents cracking.
- → How can I ensure stiff peaks when whipping egg whites?
Use room temperature egg whites and ensure the mixing bowl is clean and free of grease. Beat until the mixture is glossy and holds stiff peaks for best results.
- → Is this dessert suitable for gluten-free diets?
Yes, it contains no gluten ingredients and is naturally gluten-free, making it suitable for gluten-sensitive individuals.