 Pin This
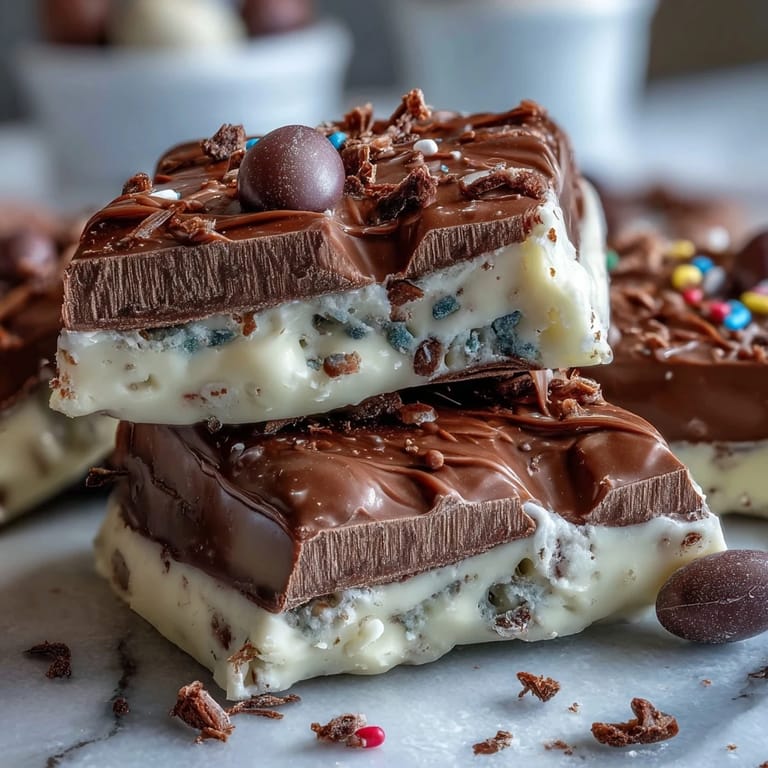
 My sister texted me a photo of her kitchen last Easter—marshmallow bits stuck to her fingers, melted chocolate everywhere, and the biggest smile. She was making this bark for her kids, and honestly, it looked like controlled chaos in the best way. That's when I realized this isn't really a recipe; it's permission to play with chocolate like you're five again, except now you get to eat the results without anyone telling you to stop.
I made this the night before my neighbor's Easter brunch, standing in my kitchen at ten o'clock with every sprinkle jar I owned lined up like soldiers. The moment I pulled it out of the fridge and broke it into shards, the kitchen smelled like pure celebration—chocolate, sugar, possibility. When I brought it over the next morning, her kids' faces told me everything. Bark might be simple, but it tastes like you actually tried.
Ingredients
- White chocolate, chopped or chips (300 g): This is your canvas, so use something you'd actually eat straight—cheap chocolate tastes cheap, and there's nowhere to hide when your ingredient list is this short.
- Pastel-colored candy melts (50 g total, any mix of pink, yellow, blue, purple): These melt faster and smoother than regular chocolate, and they give you those dreamy swirls that make everything look intentional.
- Mini Cadbury eggs, roughly chopped (120 g): They're the star of the show—those pieces of crispy shell and creamy center catch light and flavor all at once.
- Pastel-colored sprinkles (2 tbsp): Scatter these while the chocolate is still wet so they stick; add them after and they'll slide right off like tiny, delicious betrayals.
- Mini marshmallows, optional (30 g): I skip these sometimes and add them other times depending on my mood, but when you include them, they create these little pockets of sweetness.
Tired of Takeout? 🥡
Get 10 meals you can make faster than delivery arrives. Seriously.
One email. No spam. Unsubscribe anytime.
Instructions
- Prepare your stage:
- Line your baking sheet with parchment paper and set it somewhere you won't accidentally bump it—you want this bark to stay flat and honest. Having everything within arm's reach before you start melting chocolate makes the whole process feel less frantic.
- Melt the white chocolate base:
- Chop your white chocolate into smaller pieces if it's one big block, then melt it in thirty-second bursts in the microwave, stirring between rounds. This patient approach keeps it smooth instead of seized and grainy, which is the difference between velvet and concrete.
- Melt your pastel colors separately:
- Each candy melt color gets its own small bowl and a quick trip to the microwave according to package instructions. Keeping them separate means you control exactly where each color goes—no muddy brown surprises.
- Spread the white chocolate base:
- Pour your smooth white chocolate onto the center of the parchment and use a spatula to spread it into a rough rectangle about half an inch thick. Don't overthink the shape; chocolate bark should look like it happened naturally, not like it went through geometry class.
- Drizzle and swirl the colors:
- Drizzle each pastel color in random patterns across the white chocolate, then grab a toothpick or skewer and gently drag it through the colors to create that marbled effect. The moment you see those swirls come together is oddly satisfying.
- Top immediately while wet:
- Before the chocolate sets, sprinkle your chopped Cadbury eggs, pastel sprinkles, and marshmallows all over the surface. The warmth of the chocolate makes everything adhere like it was always meant to be there.
- Press gently to secure:
- Use your fingers or the back of a spoon to press the toppings into the chocolate just enough so they stick without sinking. You're not trying to embed them; just letting gravity have a friend.
- Chill until set:
- Slide the whole sheet into the refrigerator for at least thirty minutes, or until the chocolate feels completely firm when you tap it. This is when your kitchen starts smelling like an Easter candy store.
- Break and serve:
- Once set, break the bark into pieces with your hands for that rustic look, or use a sharp knife for cleaner shards if you're feeling precise. Either way tastes the same—like you have your life together.
 Pin This
 There's something about handing someone a piece of chocolate bark that makes them feel special, even though you barely did anything. My coworker bit into a piece I brought in and said it tasted like Easter morning, and I realized she was right—this bark tastes like anticipation and joy mixed together with chocolate.
Flavor Combinations Worth Trying
Dark chocolate instead of white gives you sophistication; milk chocolate leans into comfort and nostalgia. I've made versions with crushed pistachios for a salty-sweet moment, and adding a pinch of sea salt to the white chocolate base changes everything—suddenly it's not just candy, it's a flavor conversation. The beauty of bark is that it's a starting point, not a destination.
Storage and Gifting
Keep this in an airtight container in the fridge where it'll stay perfect for two weeks, though honestly, it never lasts that long in any kitchen worth its salt. If you're wrapping it as a gift, break it into pieces and layer it in a box with parchment between the shards so nothing sticks to everything else. That's not overthinking; that's the difference between a gift that looks thoughtful and one that looks like it survived a journey.
Customizing for Your Crowd
The real magic of this bark is how it bends to whoever's eating it—kids love it because it's colorful and crunchy, adults appreciate it because it tastes more sophisticated than it looks, and people with strict diets can usually find a version that works. I once made a dairy-free version using coconut chocolate and colored coconut oil drizzles for a friend, and it was just as stunning. You could add chopped almonds, swap the Cadbury eggs for any candy you love, or even try white chocolate with gold or silver edible dust for a completely different mood.
- Substitute dark or milk chocolate for richer depth and a less sweet experience.
- Add chopped nuts like pistachios or almonds if you want texture that actually resists your teeth.
- A tiny pinch of sea salt on top of the white chocolate base elevates the whole thing in ways that will confuse and delight people.
 Pin This
 Make this when you want your kitchen to feel like a celebration, because chocolate bark has a way of turning an ordinary afternoon into something worth remembering. It's the kind of recipe that reminds you cooking doesn't need to be complicated to feel like love.
Recipe Q&A
- → What chocolates work best for the bark base?
White chocolate creates a smooth, sweet base, but dark or milk chocolate can add richer flavor variations to the bark.
- → How do I achieve the marbled pastel effect?
Melt pastel candy melts separately and drizzle them over melted white chocolate. Gently swirl with a toothpick for a beautiful marbled pattern.
- → Can I add other toppings besides Cadbury eggs?
Yes, chopped nuts like pistachios or almonds and mini marshmallows make great additions to provide varied textures and flavors.
- → How should the bark be stored?
Keep the bark in an airtight container in the refrigerator to maintain freshness for up to two weeks.
- → What is a good beverage pairing for this treat?
A light, sweet Moscato d'Asti complements the delicate flavors and creamy texture of the chocolate bark wonderfully.
- → How long does the chilling process take?
Set the bark in the fridge for at least 30 minutes or until it is completely firm for easy cutting and serving.