 Pin This
 Last winter, I was craving something warm and comforting but didn't want the heaviness of a typical pasta bake. My kitchen was freezing, and I kept staring at this leftover rotisserie chicken thinking there had to be a better way to use it than another sandwich. That's when I grabbed some pitas from the back of the pantry and decided to stuff them with everything I loved about spinach artichoke dip. The smell that filled my tiny apartment made me forget all about the snow piling up outside.
My sister was visiting that first time I made these, and she literally stopped mid conversation to ask what was creating that incredible aroma. We ended up eating them standing at the counter because neither of us could wait to sit down properly. Now she texts me every time she makes them, usually with some variation she discovered like adding sun-dried tomatoes or extra red pepper flakes.
Ingredients
- 2 cups cooked chicken breast: Rotisserie chicken works perfectly here and saves you so much time, plus it adds that seasoned depth you can't quite replicate at home
- 1 cup canned artichoke hearts: Drain them really well and pat them dry with paper towels to prevent your filling from getting watery
- 1 cup fresh spinach: Chop it finely so it distributes evenly throughout every bite instead of clumping together
- 1/2 cup Greek yogurt: Use plain Greek yogurt for that tangy creaminess that balances the richness of the cheeses
- 1/4 cup light mayonnaise: This just helps bind everything together without making the filling too heavy
- 1/2 cup shredded mozzarella cheese: Freshly shredded melts so much better than the pre-shredded stuff with all its anti-caking agents
- 1/4 cup grated Parmesan cheese: This adds that salty, umami punch that makes the whole filling taste restaurant quality
- 1 clove garlic: Fresh minced garlic is non-negotiable here, the jarred stuff just doesn't have the same punch
- 1/2 teaspoon onion powder: This adds background depth without the texture of actual onion pieces
- 1/2 teaspoon dried oregano: Mediterranean dried oregano has that floral, earthy flavor that makes everything taste authentic
- 1/4 teaspoon crushed red pepper flakes: Even if you're sensitive to heat, this tiny amount cuts through the creaminess beautifully
- Salt and black pepper: Taste your filling before stuffing the pitas, artichokes can already be pretty salty
- 4 large pita breads: Whole wheat pitas hold up better during baking and add a nice nutty flavor
- Fresh parsley: This bright green garnish makes the dish look finished and adds a fresh hit against all the warm, cooked flavors
- Lemon wedges: A quick squeeze right before eating transforms the whole dish
Tired of Takeout? 🥡
Get 10 meals you can make faster than delivery arrives. Seriously.
One email. No spam. Unsubscribe anytime.
Instructions
- Get your oven ready:
- Preheat to 375°F and clear enough rack space for a baking sheet, you'll want the heat circulating evenly around the pitas.
- Make the filling:
- Mix everything together in a large bowl until the chicken is evenly coated, but don't overwork it or the mixture can become pasty.
- Prep the pitas:
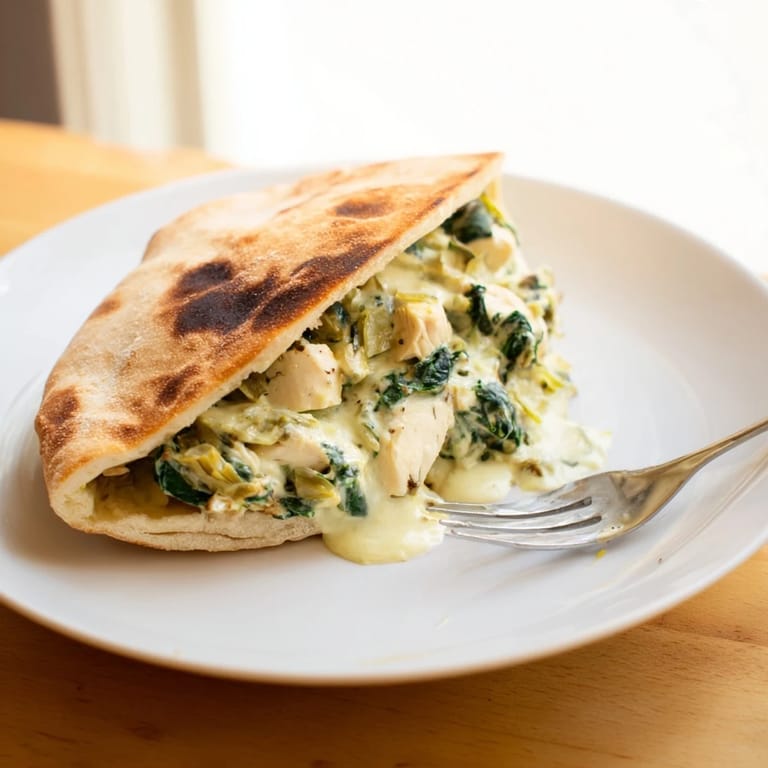
- Carefully slice each pita in half to create pockets, taking care not to tear through the bottom or your filling will spill out.
- Stuff them generously:
- Use a spoon to fill each pita half, pressing the filling in gently but don't force it or the bread will split.
- Arrange for baking:
- Place the pitas on a parchment-lined baking sheet cut side up, leaving a little space between each one.
- Bake until golden:
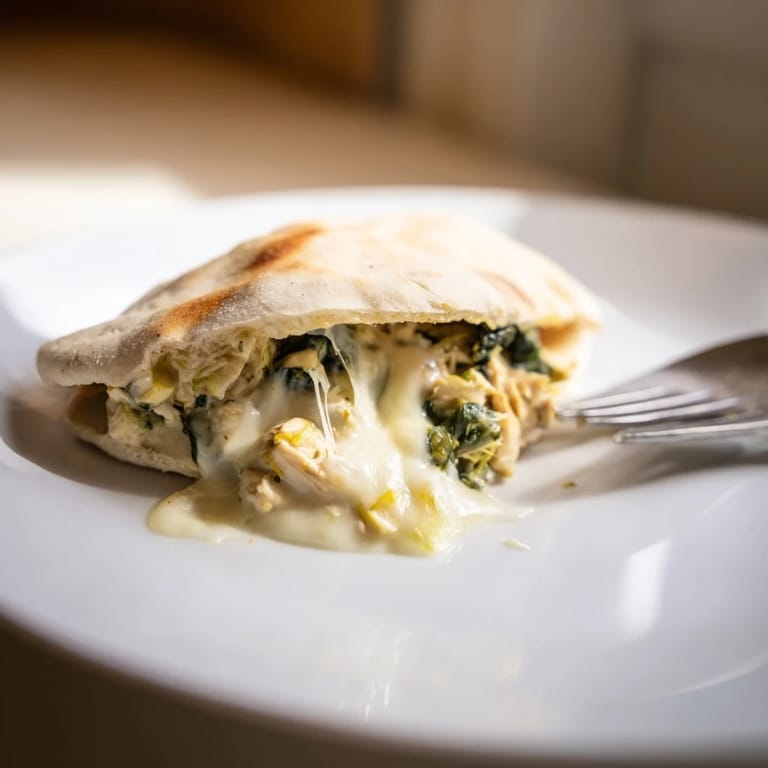
- Let them go for 15 to 20 minutes until the cheese is melted and bubbling and the pita edges are starting to crisp.
- Finish and serve:
- Sprinkle with fresh parsley and bring those lemon wedges to the table for squeezing right before eating.
 Pin This
 These became my go-to meal prep lunch because they're so satisfying but don't leave me feeling sluggish all afternoon. Something about that combination of warm pita, melty cheese, and bright lemon just hits differently on busy days.
Making It Your Own
I've learned that cream cheese instead of Greek yogurt makes an incredibly rich version for special occasions. Sometimes I add roasted red peppers when I want extra sweetness and color, and fresh basil instead of oregano completely changes the flavor profile in the best way.
The Perfect Side
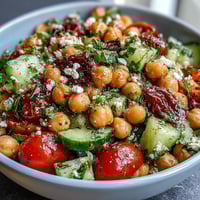
A crisp green salad with a vinaigrette cuts through the creaminess perfectly. I also love serving these alongside roasted vegetables or even some simple cucumber and tomato salad when I want something lighter.
Make Ahead Magic
You can prepare the filling up to two days in advance and keep it refrigerated in an airtight container. The flavors actually develop and get better during that time, just give it a good stir before stuffing your pitas.
- Freeze unstuffed pitas by wrapping them tightly in plastic and then foil, they'll keep for about a month
- Reheat baked pitas in a 350°F oven for 10 minutes instead of the microwave to maintain that crispy exterior
- Extra filling makes an amazing dip for crackers or vegetables the next day
 Pin This
 These pitas have become such a staple in my kitchen because they hit that perfect balance between comfort food and something that feels a little special. Hope they become a favorite in your home too.
Recipe Q&A
- → Can I prepare the filling ahead of time?
Yes, you can prepare the spinach artichoke chicken mixture up to 24 hours in advance. Store it in an airtight container in the refrigerator, then stuff and bake when ready.
- → What type of chicken works best?
Rotisserie chicken is convenient and adds excellent flavor. You can also use leftover cooked chicken breast, or poach fresh chicken for a lighter option.
- → How do I prevent the pita from drying out?
Don't overbake—20 minutes should be sufficient. Keep the oven at 375°F and check after 15 minutes. The filling's moisture helps keep the pita tender.
- → Can I make this filling dairy-free?
Substitute Greek yogurt with dairy-free sour cream, use dairy-free cheese alternatives, and replace mayonnaise with a plant-based option. The filling will be lighter but still creamy.
- → What are good side dishes to serve with this?
A crisp green salad, cucumber salad, roasted vegetables, or a light Mediterranean tomato salad complement the pitas perfectly. Lemon wedges enhance the flavors beautifully.
- → Can I freeze the stuffed pitas?
Yes, assemble and freeze unbaked pitas on a baking sheet, then transfer to freezer bags for up to 3 months. Bake from frozen, adding 5-10 minutes to cooking time.