 Pin This
 There was a Thursday afternoon when I opened the fridge and found half a cabbage sitting there, slightly wilted but still good. I wasn't in the mood for coleslaw, and soup felt too heavy for the warm kitchen. That's when I remembered watching my neighbor flip golden fritters in her cast iron pan years ago, the edges bubbling and crisping beautifully. I grabbed the grater and got to work, and within half an hour, I had a plate of crispy, savory bites that disappeared faster than I could make them.
I made these for a casual get together once, thinking they'd be a simple side option. Instead, people hovered around the stove, snatching them straight from the paper towels before they even cooled. Someone asked if I'd trained at a culinary school, which made me laugh because I was just using up vegetables. The compliments kept coming, and I realized that sometimes the best dishes are the ones born from necessity and a little creativity.
Ingredients
- Green cabbage: Shred it finely so it cooks evenly and integrates smoothly into the batter without creating clumps.
- Carrot: Adds natural sweetness and a pop of color that makes each fritter more visually appealing.
- Spring onions: Their mild sharpness brings depth without overpowering the delicate cabbage flavor.
- Eggs: They bind everything together and give the fritters structure so they hold their shape in hot oil.
- All purpose flour: Provides the base for a tender interior, but don't overmix or they'll turn tough.
- Cornstarch: This is the secret to extra crispiness on the outside, creating that satisfying crunch.
- Baking powder: A small amount lightens the texture and helps them puff slightly as they fry.
- Garlic powder and smoked paprika: These add warmth and a hint of smokiness that makes the flavor more complex.
- Fresh parsley: Brightens the whole mixture and adds a fresh, herby note throughout.
- Milk: Loosens the batter just enough to coat the vegetables without being too runny.
- Greek yogurt: Forms the creamy base of the dipping sauce and adds tang with a bit of protein.
- Lemon juice and Dijon mustard: These bring acidity and sharpness that cut through the fried richness beautifully.
- Honey: Just a touch balances the tartness and rounds out the sauce with subtle sweetness.
Tired of Takeout? 🥡
Get 10 meals you can make faster than delivery arrives. Seriously.
One email. No spam. Unsubscribe anytime.
Instructions
- Prep the Vegetables:
- Combine the shredded cabbage, grated carrot, and sliced spring onions in a large bowl, tossing them together so they're evenly distributed. This ensures every fritter has a good mix of flavors and textures.
- Mix the Wet Ingredients:
- Whisk the eggs, milk, salt, pepper, garlic powder, smoked paprika, and parsley in a separate bowl until smooth and well blended. The mixture should smell fragrant and slightly savory.
- Add the Dry Ingredients:
- Stir in the flour, cornstarch, and baking powder until you have a thick, lump free batter. Don't overwork it or the fritters will lose their tenderness.
- Fold in the Vegetables:
- Add the cabbage mixture to the batter and mix gently until every shred is coated. The batter should cling to the vegetables without pooling at the bottom.
- Heat the Oil:
- Pour about a quarter inch of vegetable oil into a large skillet and heat over medium until it shimmers but doesn't smoke. Test with a small drop of batter, it should sizzle immediately.
- Fry the Fritters:
- Scoop about two tablespoons of batter per fritter, gently flatten them in the pan, and fry in batches for three to four minutes per side until golden and crispy. Avoid crowding the pan or they won't crisp properly.
- Drain and Keep Warm:
- Transfer the cooked fritters to a plate lined with paper towels to absorb excess oil. You can keep them warm in a low oven while you finish the rest.
- Make the Dipping Sauce:
- Whisk together the Greek yogurt, mayonnaise, lemon juice, Dijon mustard, honey, minced garlic, salt, and pepper in a small bowl until smooth. Taste and adjust the seasoning as needed.
- Serve:
- Arrange the warm fritters on a platter with the tangy dipping sauce on the side. They're best enjoyed immediately while still hot and crispy.
 Pin This
  Pin This
 One evening, my youngest refused to eat vegetables no matter how I presented them. I fried up a batch of these fritters without mentioning what was inside, and she devoured three before asking what they were. When I told her it was cabbage and carrots, she paused, shrugged, and reached for another. That small victory felt bigger than any fancy dinner I'd ever made.
How to Get the Crispiest Fritters
The key is controlling moisture and heat. Make sure your shredded cabbage isn't too wet, if it seems damp, press it gently in a clean towel before mixing. Use enough oil so the fritters can float slightly and fry evenly, but not so much that they're deep frying. Medium heat is your friend here, it gives the batter time to cook through while the outside turns golden and crisp without burning.
Variations and Swaps
You can swap the cabbage for shredded zucchini or Brussels sprouts if you want a different flavor profile. I've added corn kernels and diced bell peppers when I had them on hand, and the fritters turned out just as delicious. For a spicy twist, mix in some finely chopped jalapeño or a pinch of cayenne. If you're avoiding gluten, a good all purpose gluten free flour blend works perfectly, just make sure it includes a binder like xanthan gum.
Storing and Reheating
Leftover fritters can be stored in an airtight container in the fridge for up to three days. To reheat, place them on a baking sheet in a 375 degree oven for about 10 minutes until they crisp up again. Microwaving will make them soggy, so avoid that if you want to preserve the texture. The dipping sauce keeps well in the fridge for up to five days and actually tastes better after the flavors have melded overnight.
- For meal prep, you can make the batter ahead and fry them fresh when needed.
- Freeze cooked fritters on a tray, then transfer to a freezer bag for up to two months.
- Reheat frozen fritters straight from the freezer in a hot oven for best results.
 Pin This
 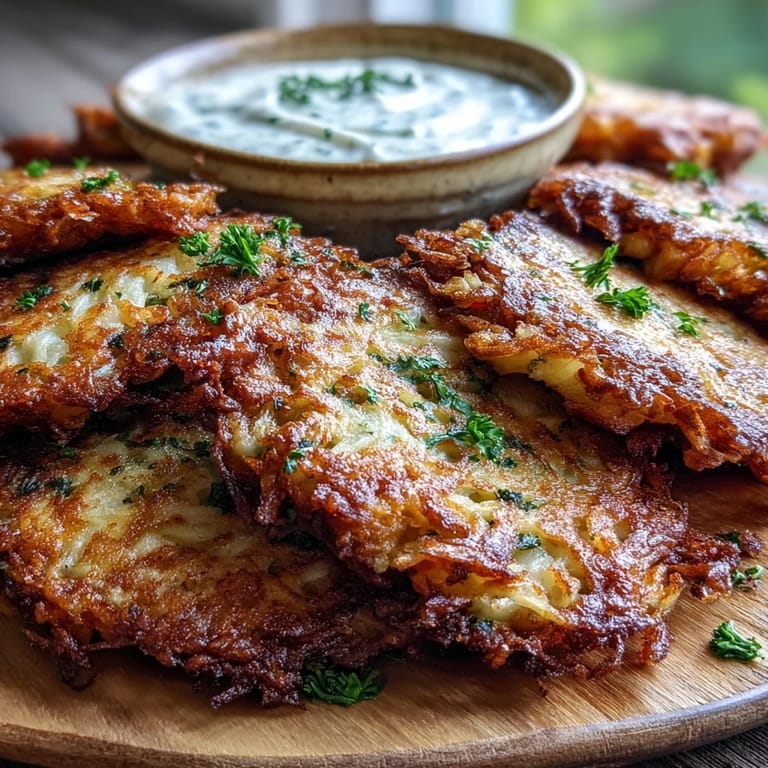 Pin This
 These fritters have become my go to whenever I need something quick, satisfying, and a little bit special. They're proof that you don't need exotic ingredients or complicated techniques to make something people remember.
Recipe Q&A
- → Can I make these fritters ahead of time?
Yes, you can prepare the batter up to 2 hours in advance and refrigerate it. For best results, fry them fresh just before serving to maintain their crispy texture. Cooked fritters can be reheated in a 350°F oven for 5-7 minutes.
- → What can I use instead of all-purpose flour?
You can substitute with a gluten-free flour blend in equal amounts. Rice flour or chickpea flour also work well and add a slightly different flavor profile while maintaining the crispy texture.
- → How do I know when the oil is hot enough for frying?
Drop a small amount of batter into the oil. If it sizzles immediately and rises to the surface, the oil is ready. The ideal temperature is around 350°F. If the oil is too hot, the fritters will brown too quickly without cooking through.
- → Can I bake these instead of frying?
Yes, you can bake them at 400°F for 20-25 minutes, flipping halfway through. Brush both sides lightly with oil before baking. While they won't be as crispy as fried versions, they'll still be delicious and lighter.
- → What other vegetables can I add to the fritters?
Zucchini, bell peppers, corn kernels, or finely chopped broccoli work wonderfully. Just be sure to squeeze out excess moisture from watery vegetables like zucchini to prevent soggy fritters.
- → How should I store leftover fritters?
Store cooled fritters in an airtight container in the refrigerator for up to 3 days. Reheat in a skillet over medium heat or in the oven to restore crispiness. They can also be frozen for up to 2 months.